
I have fun things to share!! So, living on a very very tight budget in tiny apartments 90% of our married life left very little money for "decorating". Our walls are hung with a few family pictures, and that is about it. I've been saving up Cooks Illustrated magazines for years, thinking someday I might "do something" with some of the artwork on the covers. They have little 5x7 paintings on the front, and 8x10 sketches on the back that I've always thought were beautiful, and I finally used them!! The hardest part was picking favorites. And now, for the first time in my married life, I have ART on my walls. In my kitchen, no less!! It makes me smile from ear to ear every time I enter my kitchen now. :)


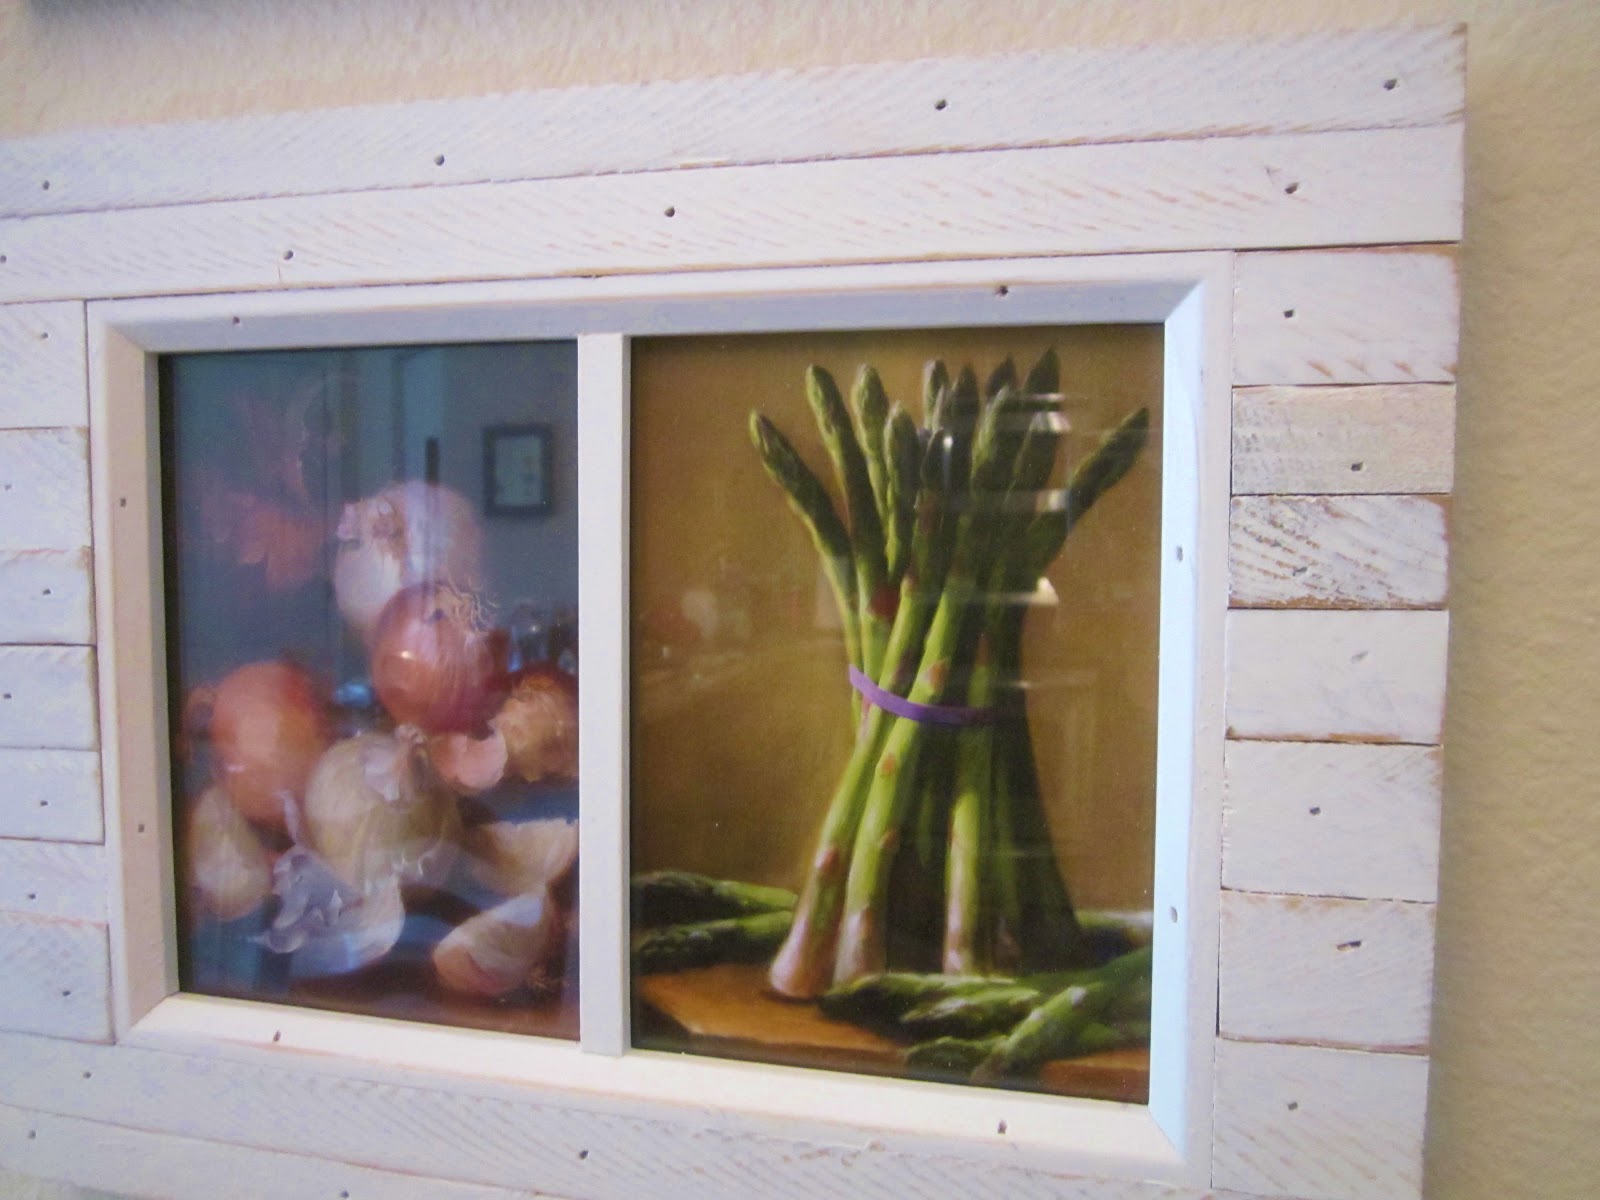


I know the pictures aren't that great, but I just HAD to show you!!!

Rosemary Bread (adapted slightly from Mel's Kitchen Cafe)
1 Tb sugar
1 1/2 cups warm water
2 3/4 – 4 cups all-purpose flour (I ended up using 3 3/4)
1 tsp kosher (coarse) salt (or 2 tsp table salt)
1 1/2 Tb dried rosemary, chopped and divided (or a heaping tsp of fresh)
A few Tb olive oil for brushing
kosher (coarse) salt and 3 more Tb melted butter for topping
In a large bowl combine the yeast, sugar and water. If using active dry yeast, let this mixture stand until foaming and bubbly, about 5 minutes. Add two cups of the flour, salt and 2/3 of the chopped rosemary. Mix. Continue adding flour,a 1/4 cup at a time, until it comes together in a soft, barely sticky dough. Knead the dough by hand or with an electric mixer for 4-5 minutes, adding additional flour only if the dough is overly sticky and not clearing the sides of the bowl.
Transfer the dough to a large, lightly greased bowl and cover with plastic wrap (I like to just spray my bowl and the top of the dough with baking spray before covering). Let the dough rise until doubled in size, about 1-2 hours.

Once doubled, gently deflate the dough and divide in half. Lightly grease/line a baking sheet with parchment paper. Shape the dough into two smooth, oval shaped loaves and place them on the baking sheet, so they have room to rise and bake without touching. Cover the loaves with lightly greased plastic wrap and let them rise again until nearly doubled, about an hour.

Preheat your oven to 425 degrees. Brush loaves with olive oil and sprinkle with a bit more rosemary and kosher salt. Bake the loaves for 18-20 minutes until browned. Remove from the oven and brush with just a bit more olive oil, and sprinkle a little bit more salt on top. Let mostly cool before serving.
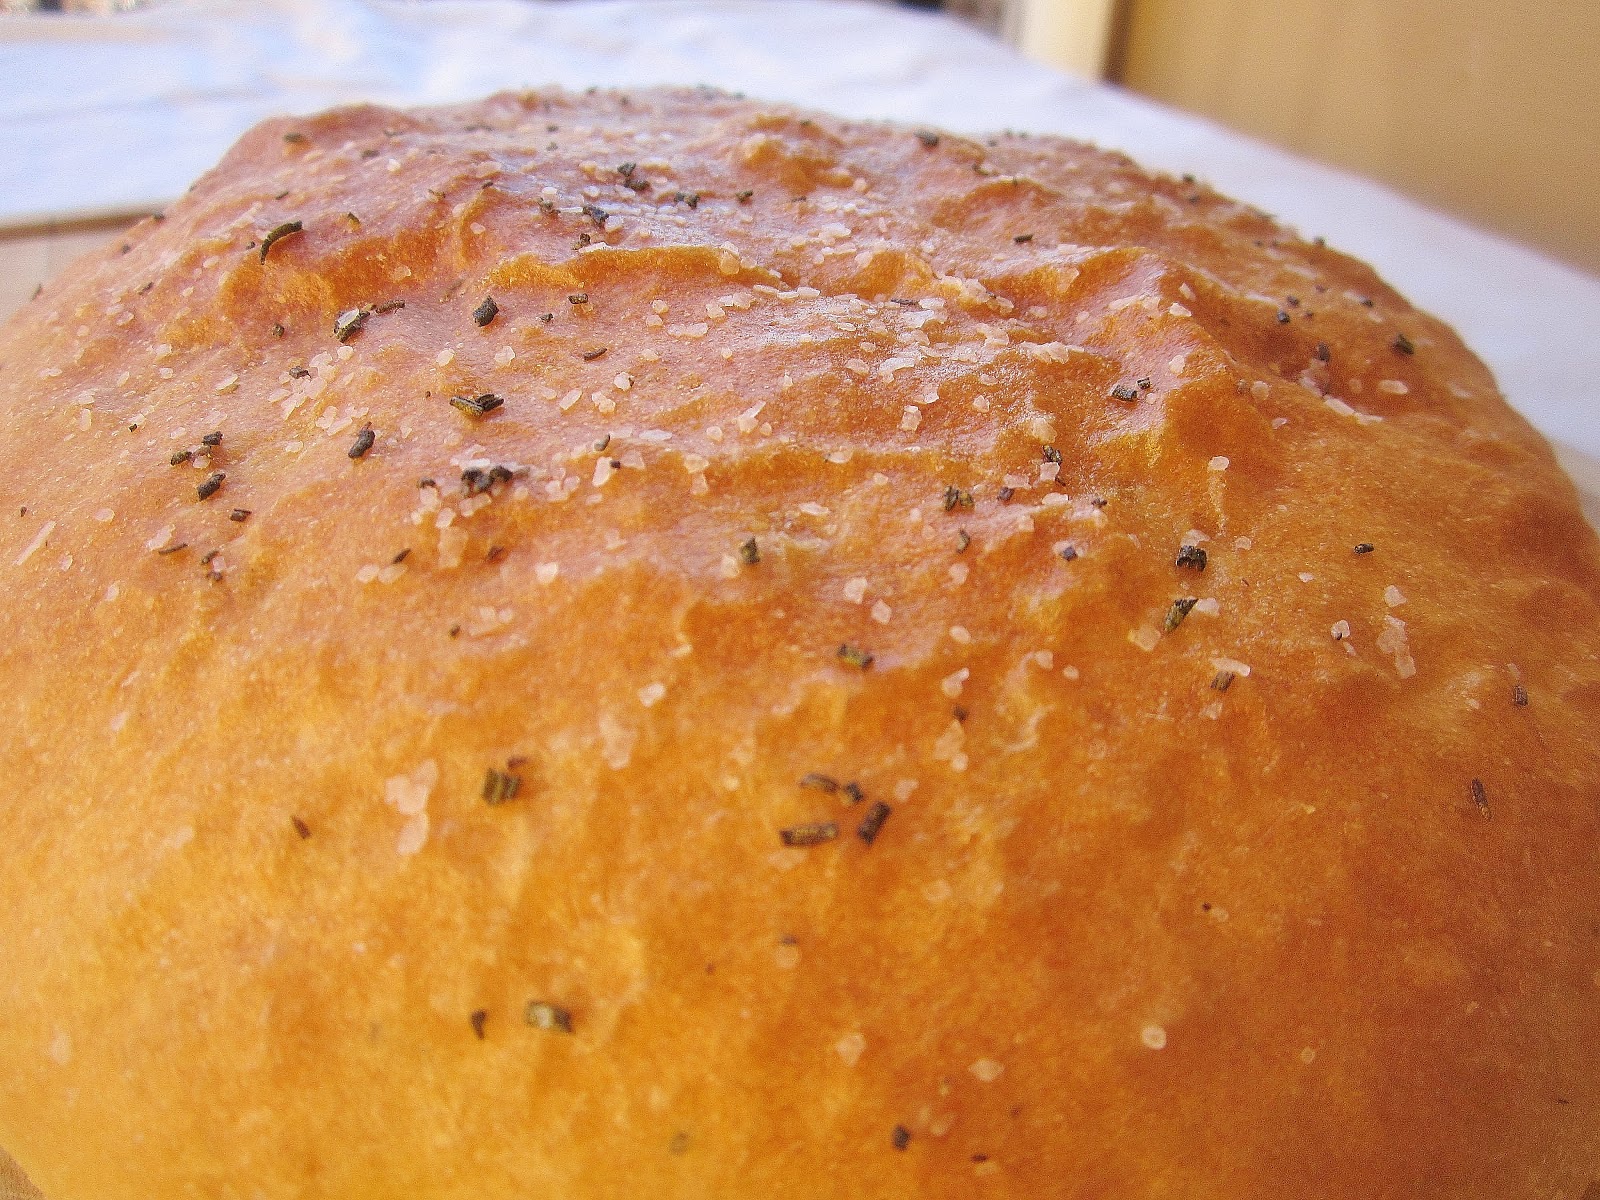
This is kind of a copycat recipe of the bread served at Macaroni Grill Restaurants, and it's been so long that I had it that I can't garauntee how close it is... But it's delicious either way! My favorite part is the salty, buttery, crispy crust. Yum!!

The rosemary is fragrant with a bit of bite, the bread is fluffy and buttery...

Mine over-rose a little, so your holes won't be quite this huge. That's okay!! Its scrumptious, and a wonderful accompaniment to pasta. (or just about anything else, really)

A delicious, simple rustic bread. Too bad I didn't have the presence of mind to set out some olive oil for dipping! Try it, I hope you like it!
*UPDATE!! After multiple tweaks and tries of this bread, I have eliminated the butter, and changed the brushing/sprinkling a bit. Try to find a good-quality olive oil (my favorite has "buttery" notes) and it will take this bread over the top!!*
*UPDATE!! After multiple tweaks and tries of this bread, I have eliminated the butter, and changed the brushing/sprinkling a bit. Try to find a good-quality olive oil (my favorite has "buttery" notes) and it will take this bread over the top!!*
Your bread looks perfect April! When you come over HERE, (and I know it's going to happen!)we will have to make bread together and you can show me all of your tips! I love your idea about framing all of the art from the mags. It looks really nice. You did a fab job of it. You're such a cutie pie. I just love you to bits! xxoo
ReplyDeleteWhat a great idea! I've always loved those pics too, they're one of the best parts of the magazines. I'm so excited to see your posts about your Christmas! Are you going to get a wild tree, or farm tree? I'm SO excited to help the fam decorate the tree here again!!! I LOVE CHRISTMAS! *explodes in a cloud of glitter*
ReplyDeleteI'll definitely be trying this bread, yum!
ReplyDeleteYour artwork looks wonderful but the best part of is: it makes YOU happy, and that's what counts.
Oh wow this looks totally amazing!! I will be pinning this recipe!
ReplyDeleteHelen
Blue Eyed Beauty Blog
You don't have a link for a printable recipe. Do you mind posting one? I live in Denver too and would love to try this.
ReplyDeleteOops, you're right!! I fixed it :) I hope you like it!!
Delete