January 21, 2013

Weekly Menu Jan. 21

Candied Orange Peel & Chocolate Orange Biscotti

For today, Dec. 4...

Outside my window... It is bright, sunny, and already in the 40's! Winter is taking another nap, it seems!

Around the house... I'm typing, the Beast is snoozing, and the boys are watching my favorite Bollywood movie! Now that Stephen can read subtitles, they asked if they could watch one. Sometimes he can't quite keep up, so I update them, but so far they're loving it! I woke up in a panic with only 20 minutes to get ready for school... until my brilliant little boy with the steel-trap memory reminded me there isn't any school today! Whew!
Source: Pinterest

I am thinking... I'm thinking we're going to have a pleasant day, go to the park, and just be. Tomorrow it gets busy around here!! 

I am thankful... For my husband, The Geologist. Today is our 8th anniversary! 8 years, 6 moves, 3 pregnancies, 2 kids, 1 dog, countless nicknames, 1 master's degree, a dozen or so hospital stays, 1 killer calculus course, and 1 dream job. We started out as best friends 12 years ago, and are still best friends. He is my favorite person, wherever he is, I am home. He's my parent's favorite child and my boys's hero. It feels like forever and no time at all, all at once! He has learned all the flowers I love (and hate), has learned that to tickle me is to tempt fate, always makes me laugh, and can make the most horrible faces. How someone that handsome can look that awful, I will never understand! He helps me be me, and I love him the mostest. 
Source: prettie-sweet


I am pondering... Adoption. Pretty much a constant these days. We're now looking at the possibility of adopting an older child. Infant adoption through private agencies is so terribly expensive, and we feel there is a child out there who truly needs us. Which means much more research on our part!! It's a bit overwhelming, but we're forging ahead! 

I am hoping... I'm hoping for at least one big, thick, traffic-stopping snowstorm this winter. We've had some dustings, but no real snowstorm. Sure, 50 degrees is nice, but we need to make a snowman!!

I am looking forward to... All of my recipes this week!! I realized towards the end of last week that I have been trying too hard with my menus. I don't HAVE to have a bread, a veggie, a main course, etc. each week. I don't have to try so hard to find healthy stuff either. I can just make what I want to make!! I haven't been as excited about the things I was making. This week I just looked for things that made me happy. So we'll see how they turn out!! I am VERY excited for these recipes!

I am going... Choir on Wednesday, multiple Dr. appointments, physical training, helping friends move, having people over for dinner, whew!!

Something new about me... You know I love flowers, but did you know I can't keep them alive?? It's true!! I kill houseplants! I either over- or under-water them, every time!! It's sad. I had a little indoor fairy garden, killed that one too... Someday, when I have a house, I will fly my green-thumb-wielding mother out to design me an April-proof garden. One that attracts birds and butterflies, and isn't too finicky. 

                                                                                             Source: idemakeriet

Guilty pleasures... Oatmeal Cream Pies. At one point last year, I was eating them by the box, every few days. I love the things! Actually, the first thing I ever pinned was a recipe for homemade ones... yet I haven't made them yet! I think I'm afraid I'll eat those by the boxful too!!

Favorite Things... Fireworks!! I love watching fireworks. When I was a kid we watched a fireworks show over the harbor, and the fireworks were reflected in the water. When the boys were tiny we watched them in Powell Gardens, in Missouri, and they had them coordinated with a symphony! But my favorite was watching them in Provo, and hearing them echo off the mountains. I love the big boom you get, deep in your chest, when you're as close as you can get to them. The sparkly gold ones are my favorites.

January 20, 2013

Heavenly Homemade Hummus

If at first your hummus doesn't succeed, try try again! I'm really loving learning how to make favorite foods at home. Cheese crackers, Thin Mints, Rosemary Olive Oil Bread, Graham Crackers, it's so much fun! And always better than the store-bought version. Of course, it's a great plus that you actually know what's in it, since you put each ingredient in yourself!

We had lunch at a Greek restaurant shortly after moving here. I was craving gyros, and that's one thing I have never successfully recreated. No idea where I would find a giant vertical spit to roast layers of meat on... or if I'd even want to! Their gyros were good, but their hummus was awesome. And I thought... "What if I made my own hummus??" I remembered when I was younger, and my Mom tried to make it... I don't know if she soaked hers first, but I remember her breaking her blender!! There was smoke, and the kitchen smelled funny for a few days... And this was one of those blenders that's supposed to be able to crush rocks and small houses and things. So I brushed off the thought.

A hummus recipe materialized in front of me on Pinterest, and the interest was re-awakened! I tried that one first, but it was a dud. The flavors never melded, and my raw garlic was WAY too sharp. So I continued searching, since I hadn't broken any major kitchen appliances with my first attempt! I found one that looked promising, and read each and every comment, and found quite a few gems in there too! So here it is: my Heavenly Homemade Hummus.


Heavenly Homemade Hummus (inspired by Big Girls Small Kitchen)
Printable Recipe

1 cup dried chickpeas (aka, garbanzo beans)

To Cook:
2 cloves peeled garlic
2 teaspoons olive oil
1/2 teaspoon salt

For Hummus:
1 1/2 teaspoons salt
juice of 2 lemons
cooked chickpeas
1/4 cup tahini (a sesame seed paste)
2 ice cubes
1/4 teaspoon cumin
a pinch of cayenne (optional)
olive oil

First, place your dried chickpeas in a medium bowl. Cover with water, at least an inch above the chickpeas. Let them sit overnight to soak, up to 24 hours. (You can use canned chickpeas, and skip the soaking, but every recipe I looked at agreed that dried made tastier, creamier hummus)

The next day, drain your chickpeas.  Place soaked chickpeas, garlic, olive oil, and 1/2 tsp salt in a medium pot.  Add enough water to cover the chickpeas by a few inches, and bring to a boil. Then lower to a simmer, and cook for 1-2 hours. (I let mine soak nearly 24 hours, so 1 hour of cooking was plenty). Test by taking one out (let it cool!) and squishing it between your fingers. You want them soft, but not falling apart. When they're soft, drain them and save the water and the garlic!!

Place chickpeas (still pretty warm), cooked garlic, and 1 1/2 tsp salt in your food processor. (You can also use a blender.) Add the lemon juice and tahini, and pulse till the mixture is smooth. Add 1 ice cube and 1-2 Tb of the chickpea water. Pulse until smooth again. Repeat with another ice cube and 1-2 Tb of chickpea water. Add cumin, cayenne (if using) and drizzle olive oil in, while processing, until hummus is as thick/thin as YOU like it. Taste, and adjust any seasonings as you like.

Serve drizzled with olive oil, sprinkled with cumin or paprika, warm or cold, with pita bread, naan, crackers, even veggies! This makes a little less than 2 cups of hummus.
I went a little crazy with my olive oil... Oops! Oh well, still so yummy! First, I have to say, this is the smoothest, creamiest hummus I've ever tasted! I found a comment on the original recipe from someone in Kuwait, who suggested the ice cubes. I don't know how they do it, but they work!
I added cayenne because I like a bit of warmth. Yum!! This hummus is deeply flavored, the garlic flavor is mellow (because it was cooked first!!) and it just melts in your mouth. I could eat it all day, really!
It would probably be healthier to eat with carrot sticks... but I'm a naan-dipping kinda girl. I love naan! Ooo, I should learn how to make that too! *adds to mental list*
Speaking of my mental list, I would love to take recipe requests!! Until then, I hope you whip up a batch of this heavenly hummus. You'll be hooked. :)

January 19, 2013

Homemade Thin Mints

Did you know that Girl Scout Cookie season is almost here? I didn't. I haven't bought any in years! But I know many people that look forward to those cookies for months. They seem to be the Holy Grail of pre-packaged cookies. I've seen the Keebler knock-offs, and taste-tested them! While their Thin Mint copycats are pretty close, their Samoas aren't remotely. I think I'll have to tackle those too, theyre my personal favorite!

Now, is it just me, or are the boxes, AND the cookies, getting smaller and smaller? And costing more and more! For shame, Girl Scout Cookie makers!! Obviously it isn't the girls' fault. Well, if Thin Mints are your cookie-craving of choice, prepare to be amazed, and save LOTS of money. Because this recipe is dead-on.  I looked through quite a few before settling on this one. One recipe even had Ritz crackers in it!! Now I am sorry, but there are no Ritz crackers in Thin Mints. This is the one that convinced me!
(PS- She has gorgeous step-by-step pictures, I'd recommend taking a peek!)


Homemade Thin Mints (from The View From Great Island)
Printable Recipe

8 ounces butter (1 cup or 2 sticks) softened
1 cup unsweetened cocoa powder (I used Dutch dark cocoa powder just like the original!)
1 cup powdered sugar
1 tsp vanilla
¾ tsp salt
1 ½ cups all purpose flour

For the coating:
10 ounces semi-sweet baking chocolate
1 ½ tsp peppermint extract (Make sure you get peppermint, not spearmint!)

Preheat your oven to 350 degrees.
Beat butter until light and fluffy, then add the powdered sugar and mix until smooth. Mix in the salt, vanilla and cocoa powder, until the batter looks like thick frosting. This will take a bit, be patient! Add the flour and mix just until the flour is combined. Don't over-mix!
Form dough into a ball and knead a together a few times to soften the dough, then flatten into a disk about 1/2-1 inch thick. Cover in plastic wrap and place in freezer for 15 minutes.
Remove dough from the freezer and roll it out on a floured surface, about 1/8-inch thick. (I like to put parchment paper down first, then flour it a bit. This dough is a bit stiff, and may crack a little around the edges. No worries! Just smoosh it back together.) Cut the cookies into 1 1/2 - 2 inch circles. (I used these little glass cups I have, you could use anything! I noticed that most of my spice jars had lids just the right size. Be creative!)
Place cookies on a parchment-lined baking sheet and bake for 10-11 minutes. You want these crunchy! Remove the cookies from the oven and allow them to cool completely.  When the cookies are cooled, make the chocolate coating! 
Chop the baking chocolate into very small pieces. Place chocolate in a microwave-safe dish, preferably glass, and place in the microwave for 30 seconds. Stir well, and repeat one or two more times, till the chocolate is completely melted.  Stir in the peppermint extract, until the chocolate is nice and smooth again.
Gently drop the cookies, one at a time, into the coating. Flip them over to cover both sides, then lift the cookie out of the chocolate with the fork and tap the fork on the side of the bowl so the extra chocolate can drip off. This also helps smooth out the tops. Place covered cookie on a parchment or plastic wrap-lined baking sheet, and repeat for the rest of the cookies. If you want them to set quickly, place them in the refrigerator for a bit. They may set just fine at room temperature. (This wasn't quite enough chocolate for me, next time i would do half-again as much, or maybe even double it!)
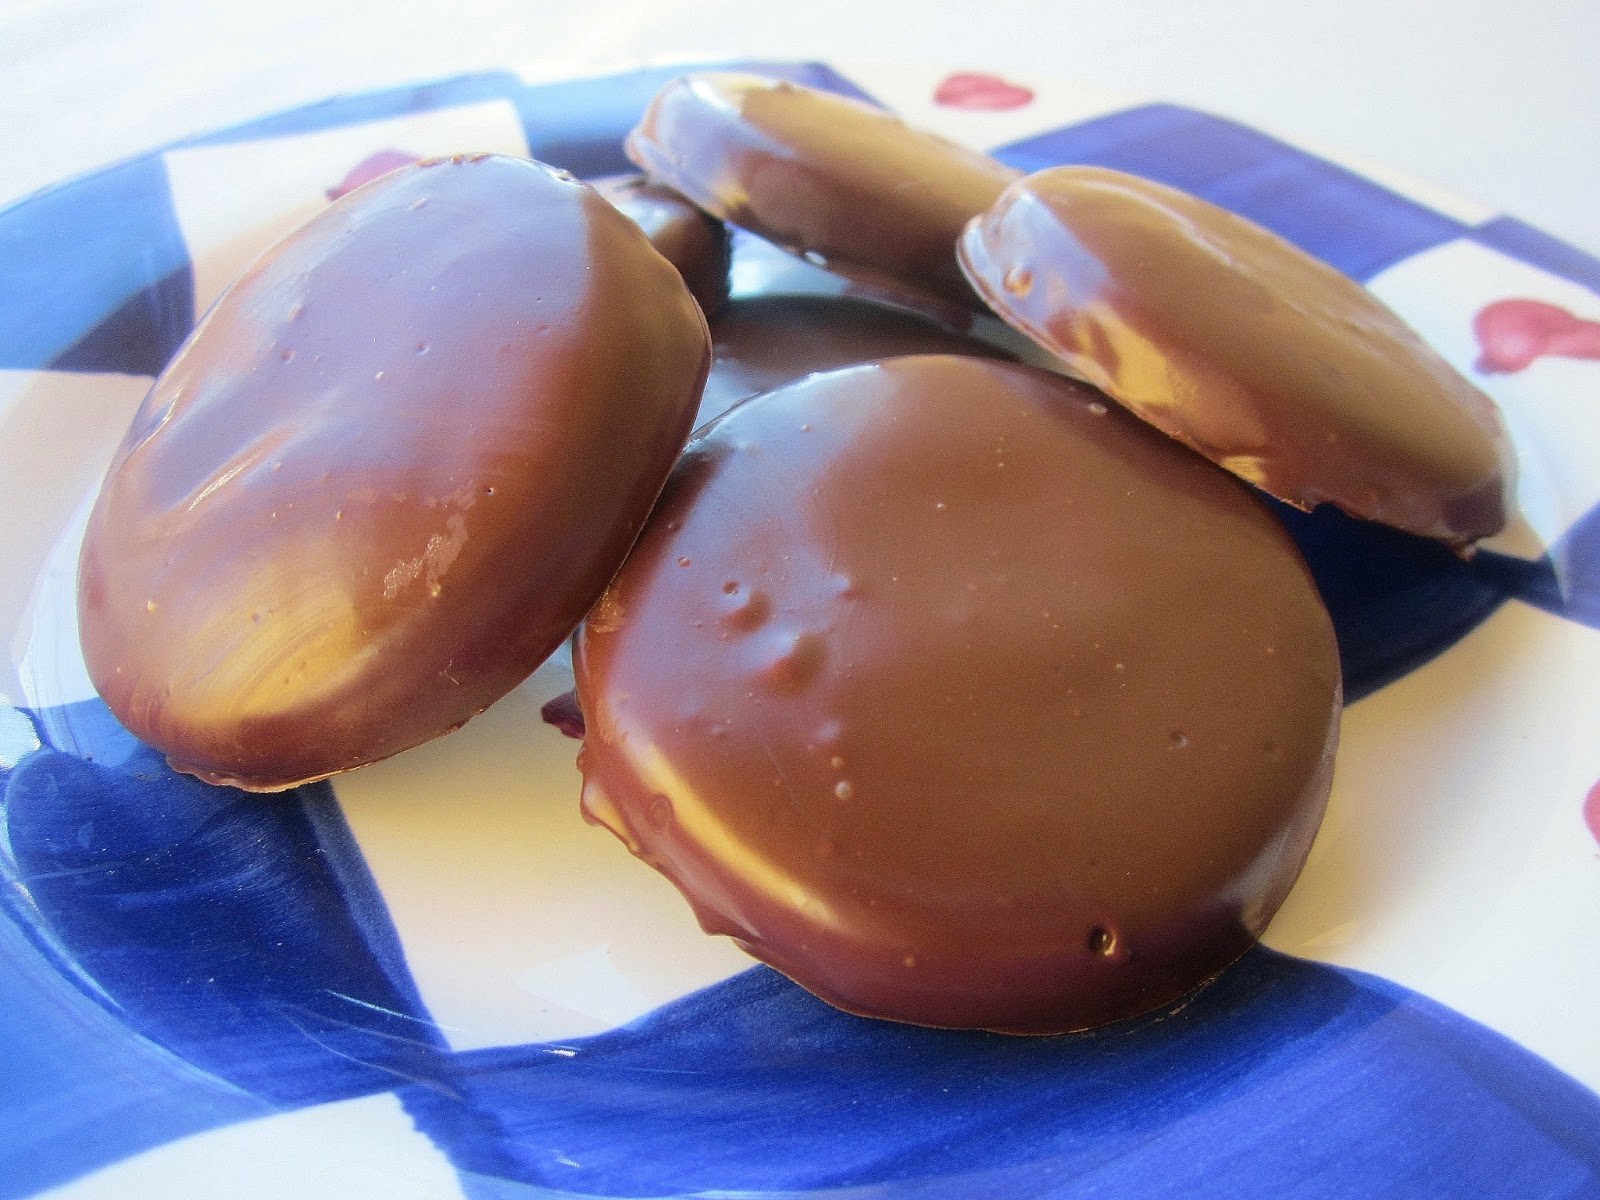
It's not very often I follow a recipe exactly, but I had a feeling I probably shouldn't mess with this one. And I'm glad I didn't! These knock-offs are perfect!
I never realized the mint was just in the chocolate, and was a bit worried, but it tastes just like I remember! Now, make sure those cookies are crunchy before you cover them. Snap one in half just to make sure. I didn't, and half of mine were too soft. They're not quite right when they're soft. Oops!!
Fudgy, Minty, Crunchy, yummy! Now you can make Thin Mints year-round, for MUCH less than those tiny boxes. 
The Chocoholic (I mean, Geologist :) has given them his seal of approval. And he has become very picky about such things, the more I bake, so you can believe him! I hope you try them, they're such fun!

January 18, 2013

Small and Wonderful Things 16

I'm doing my Small and Wonderful Things a day early this week, my Thin Mints aren't set and the sun is going down!

Window seats! This one makes me think of the one Jane Eyre was hiding from her cousins in...
Source: vedrai.tumblr

Jane Eyre, my favorite book of ALL TIME

Fish tanks in restaurants

New Awesome Doctors!

Pinecones of all shapes and sizes
Source: weheartit

Sleeping In

Happy, sunny, "just because" flowers from the love of my life!

Rolling the windows down and blasting Bollywood as I pick up Stephen from school. Oh yeah, I'm the coolest Mom around! In my own mind, at least :)

Moss. I love moss!
Source: flickr

Sleep. Sleep is a glorious thing. 

January 17, 2013

Quick & Easy Caramel Corn

I think I owe everyone a very small, sheepish, apology. I haven't been as "active" in the blogging world these past few weeks. I hardly leave any comments, it takes me forever to reply to YOUR comments, I don't read as many posts as I would like, and I feel like my little bits of sparkling conversation here at the beginnings of my posts aren't quite as sparkly as I would like them to be. I hope you'll all bear with me for a bit longer, there is a LOT on my mind these days. And not a lot of sleep. Between "getting fit", counting calories, bouts of temperature-induced insomnia, appointments up the wazoo, working towards getting a house, and now getting a bit more urgent about adoption than we expected, I'm a tad overwhelmed. I still love this blog, and the friends I have made, and the food I share! I just wanted to let you all know :) I'll catch up, eventually!

In the meantime, I will share a long-time game night staple, first growing up and now in my own little family. The yummiest, easiest Caramel Corn ever. There is no jello, or fluffiness, or creative add-ins. Just classic caramel.

Quick & Easy Caramel Corn (from The Lion House Christmas Cookbook)
Printable Recipe

2/3 cup unpopped popcorn (or you can use 2 bags microwave popcorn, a plain or lightly salted flavor)
1/2 cup butter (1 stick)
2 cups light brown sugar
1/2 cup light Karo syrup (corn syrup)
1 Tb water
a pinch of baking soda

Pop your popcorn! Air popper, microwave, stovetop, whichever you prefer. Set aside.

Melt butter in small saucepan over medium-high heat. Add brown sugar, corn syrup, and water. Cook, stirring constantly, till sugar is dissolved and mixture reaches a hard boil. (I never bother measuring the actual temp, I just let it get all vigorously bubbly for a minute or two) Remove from heat and immediately stir in the pinch of baking soda. Pour caramel over popcorn, in a very large bowl. Stir to coat thoroughly. Wait a few minutes before eating, that caramel is HOT!!

Here's a tip: The best way on EARTH of getting this popcorn evenly covered is to: place one large brown paper grocery bag inside another, so you have a doubled paper bag. Put your popcorn in this paper bag, and pour the caramel over the top. Close the top of the bag, and roll it over and scrunch it, so you have a firm hold on it, and no popcorn or caramel is going to escape! Now, shake and beat and knead that bag of popcorn, nearly to death! Open the bag and scrape popcorn and caramel out into a large bowl. Yes, some caramel will remain stuck on the bag. It's okay, there's plenty. This is our favorite way to do it! Unfortunately, we were out of paper bags for this batch. :)
Mmmm, buttery caramel corn at it's best! While warm, this is perfectly sticky and chewy, it hardens up a bit as it cools, but not tooth-breaking or anything.
It's rich, and sweet, and delicious. Oh, and easy! Someday I'll have to take a picture of it outside, with better light!
And oh, so addictive... I have a hard time trying to stop eating the stuff! Makes marvelous popcorn balls too!

January 16, 2013

Potato and Onion Tart

I forgot to mention this on Monday... or yesterday... :) But I have been issued a Challenge! My dear friend Cherie teasingly challenged me to go a whole week without using citrus, nutmeg, cinnamon, or cranberries! Technically, she dare-double-dared me. :) Can I pass up a challenge?? Of COURSE not!! Hence, this week is citrus, spice, and cranberry free. But all bets are off next week!! Muahahahaaaa :) Unless you count the teensy bit of lemon in the Pork Tenderloin marinade... which I don't. So there.

Boy, things sure aren't made as well as they used to be. I bought a new speaker system for our computer a few months ago. The old one only worked out of one speaker, so half of the music was muted or missing, and it went through a "subwoofer" with a big hole carved out of its back, where we tried to fix a short in it... Anyway. I was so happy with this new system! It has one of those neato little control pod things so you can plug headphones in or control volume right on top of your desk... but now this one has a short too! It only works in both speakers if you press down on the top of the control pod just right. So I taped it. Maybe I'm lazy, I just don't care enough to go get a new one, or get this one fixed... Ah well! This is me, rambling. On to the food!

Potato and Onion Tart (adapted slightly from Hizzoners Deli)
Printable Recipe

2  tablespoons butter
about a teaspoon of fresh thyme leaves
1 large onion, sliced a little more than 1/4 inch thick (we like sweet onions for this)
1 lb red potatoes, washed and sliced very thin
2 tablespoons olive oil
1/2 cup shredded Gruyère cheese
1/2 cup crumbled feta
1 cup shredded mozzarella (don't use preshredded!)
kosher salt and black pepper

Preheat your oven to 400°. Start heating an oven-safe skillet (like cast iron!) over medium-high heat. Place the butter in to melt. Place the onion slices in a single layer over the melted butter, cut side down.  Cook for 5-8 minutes, till the onions are softened. Combine the potatoes, oil, cheeses, salt and pepper in a bowl stir till evenly distributed and coated.

Pour the potato mixture over the onions, spread evenly, and bake for 45 minutes or until golden brown and cooked through. Turn upside down to serve...

Okay, this is what the picture from the website looked like...
Source: HizzonersDeli

Isn't it gorgeous?? Yeah, mine didn't turn out like that. At all. I think my cast iron skillet isn't as non-stick as it should be... I just had a pile of onions and potatoes. Darn. BUT.... No fear!! As soon as I tasted them, it no longer mattered. So maybe you'll get a gorgeous one like this. Or maybe you'll have a pile like me. Either way, it's positively delectable!
It looked fabulous when we pulled it out of the oven! All browned and bubbly, with that sweet caramelized onion smell... Mmmm...
And then we flipped it over... Sigh. Well, no matter! It is a pile of deliciousness. Soft, sweet, caramelized onions, lightly cheesy creamy potatoes...
It's like the best potato gratin I've ever had, but with onions! Which I don't often say is a good thing...
But in this case, it absolutely is. If you are less of an onion fan, I highly recommend trying sweet onions. They just might convert you!
Ah, the perfect bite. Soft, sweet onions with tender, creamy potatoes. Yum!! We wish we could make this again soon, but we're trying to be healthier, and this is NOT healthy. But ohhh, so yummy! Either way, it made it on the "The List".